It's spring, and for a lot of us, that means it's time for awesome long rides on the mountain bike. Whether we're beginner or expert, it's also time to get reacquainted with our riding muscle memory as well as develop some new skills.

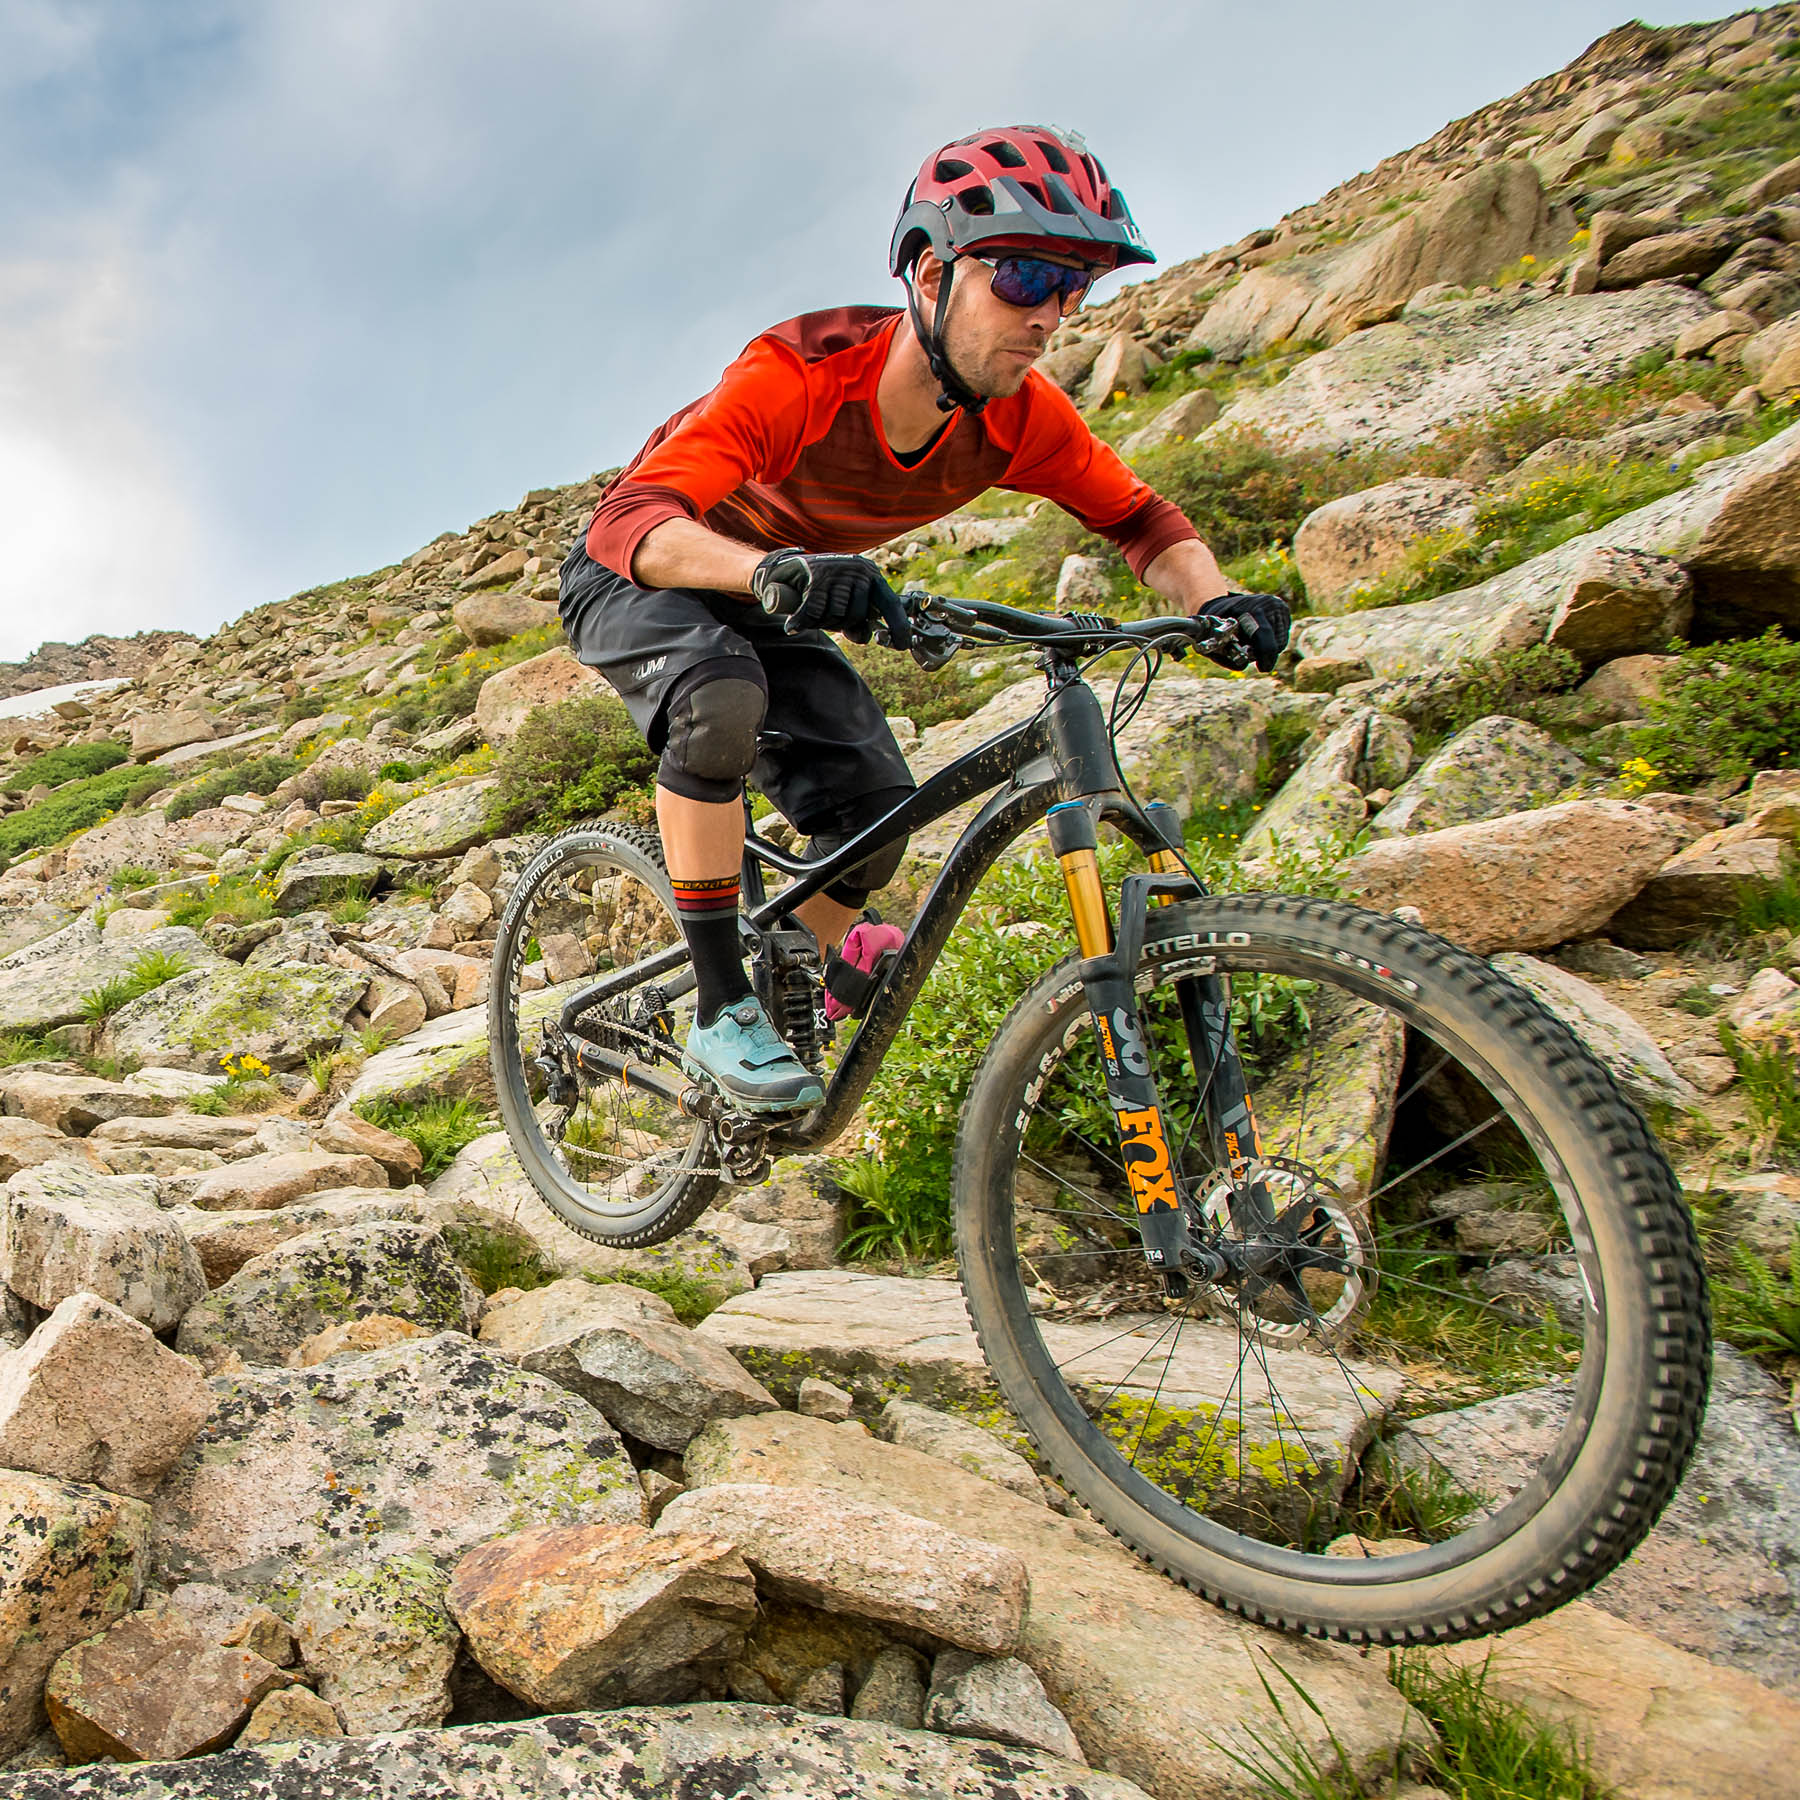
Beginners should focus heavily on body position since it is the critical foundation of safe and skilled riding, says Lee McCormack, founder of Lee Likes Bikes and RideLogic. For those who have been riding a while, re-establishing the correct body position after the off-season will get you back in the flow quickly.
For descending, "The key is to stand up, have all of your weight in your feet and your hands neutral," McCormack says. Keeping the weight in the feet allows you to stay balanced, duplicating the athletic stance seen in most other sports (football, baseball, ultimate frisbee, fencing, you name it). If you are riding heavy in your hands, your balance is compromised, and the terrain will continually destabilize you.
"The next thing is to hinge," says McCormack. "Most people squat too much, which means you push your knees forward, stressing your quads." He guides riders to hinge at the hips, deadlift style, transferring the load to the glutes and hamstrings, which spares the quads, those muscles on the front of your thighs.
"Most important, hinging brings the shoulders down toward the bars. This gives you so much more control in cornering, braking, and negotiating obstacles. Get low, make sure your hands are light, and if you can do that, you'll be doing pretty well."
Most riders aren't low enough, which is often a bad habit ingrained from the fear instinct. "Bad skiers and bad mountain bikers look the same," says McCormack. "In both sports, we tend to lean back and push our heads up and back, away from the threat. It makes sense to our lizard brain, but it makes our riding unsafe."
This instinct to lean back can have terrible consequences for riders (and skiers!), but so many have actually been told to do this from their well-meaning riding friends. Once you're sitting in the back seat on a drop or descent, especially with your arms essentially straight, "You've loaded the catapult. It's the single most dangerous habit you can have," says McCormack. The likelihood of being flung over the bars increases dramatically with this body position, as you can repeatedly see in the "Friday Fails" videos on pinkbike.com.
Instead, McCormack repeats, stay balanced on your feet with your hands light. This keeps you centered over the middle of the bike, instead of levered off the back. You can coach yourself while riding: Light Hands, Heavy Feet.


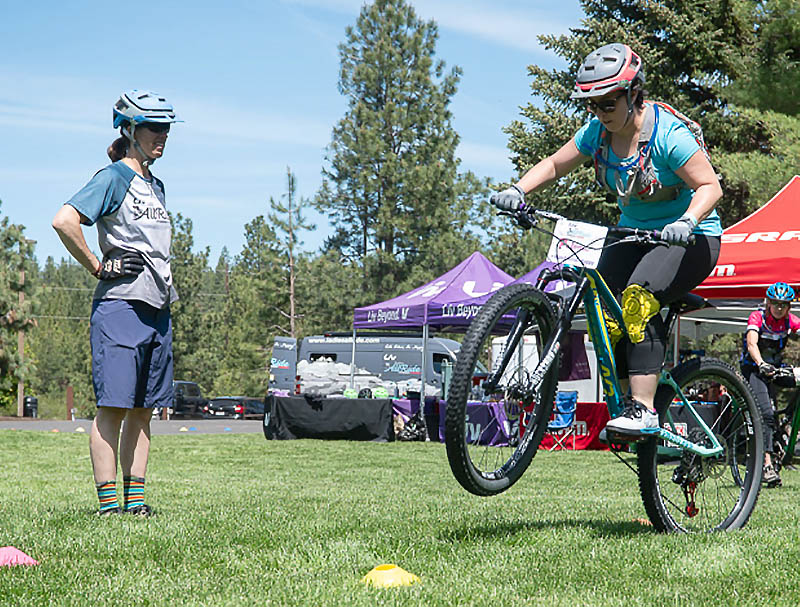
For intermediate riders, learning to get the front wheel up onto obstacles opens the door to more challenging terrain, says Lindsey Richter, founder of Ladies AllRide. Part of this is disputing the myth that doing so requires significant upper-body strength. "We get women to understand that it's technique based, not strength based. Strength in fitness, yes, but they learn that moving the body to distribute weight over the bike is more about body position than brute strength. I call it aggressive finesse."
Richter's method is to have the rider coasting as they approach the obstacle, standing on level pedals. Then they apply force to the pedals to load the bike, which Richter calls a stomp. "This weights the bike and body, also loading the suspension, if they have it. Then the bike's natural reaction is to spring up, and the rider learns to guide the wheel onto the obstacle. Absorbing this small lift, even pulling a bit to get it higher if needed, allows them to feel what it's like to get that front wheel off the ground."
Richter gives her students the shorthand of "Load, explode, pull (or absorb)" to remember this technique, and much like McCormack, wants riders to avoid that tendency to lean back. In fact, "Once the front wheel is up on the obstacle, they must shift their hips forward to unweight the rear wheel so it can roll over it or up onto it."
When her students have gotten the hang of this basic lift, she progresses them through several other wheel lifts, including a rear wheel lift, so it doesn't hang up on bigger obstacles.
This leads to a useful skill for expert riders, which is the bunny hop. "When an experienced rider is coming at things with a little more speed, where you don't have time to do isolated front and rear wheel lifts, this is where understanding how to bunny hop is key."
She describes the move as a combination of a manual front wheel lift and a rear wheel lift done together. The word "manual" comes from skateboarding, where the skater rolls along on just the back wheels of the board, with the front wheels in the air. On a mountain bike, a true manual is an extended wheelie maintained without pedaling. But for the bunny hop, the technique used to start a manual is employed to get the front wheel off the ground, followed immediately by a rear wheel lift.
First, however, Richter counsels riders against using the technique some mistakenly think is a bunny hop: lifting the bike off the ground with their clipless pedals. "That's when both wheels come off the ground at the same time. That's a level lift, and it's often dangerous." It's frequently easier for the rider to lift the rear wheel higher than the front, with ugly results.
A true bunny hop uses a rocking motion, and the bike creates an arc in the air, with the optimal landing occurring on both wheels. To begin, the rider should load and explode as before, springing up while aiming their head toward the sky for more lift. Immediately, the toes should point downward to claw and scoop the rear wheel off the ground. "Point the toes, push back on the pedals, then bend the knees to bring the rear wheel with you in the air. No matter whether you're clipped in or on flats, it's the same technique. We don't want people to rely on clips."
To start your progression to the bunny hop, do the isolated manual lift and then the rear wheel lift in succession. Then speed the moves up until they blend together, without shortchanging technique. "Even advanced riders need to break things down and understand what they're doing," Richter says. "Many people are compensating around bad habits or inefficient ways of doing things. "

McCormack's favorite expert skill suggestion is pumping, especially in regards to optimizing terrain. Pumping a bike is much like pumping a swing, where you use your body to create heavy and light movement cycles to gain speed. "The way I look at it, all trails are sine waves of love. A pump track or flow trail is an obvious one, but all shapes turn into waves. A tangle of roots might be one wave, a rock could be another wave. We need to be able to see these shapes on the trail and be able to pump them."
An excellent way to see this in action is to get on a bathroom scale, bounce and watch the weight go up and down as you make yourself heavy and light. "The most basic way to start pumping is to be in the hinged position, make sure the hands are light, then cycle up and down with the feet, like on a trampoline, and get that rhythm," McCormack says. Doing this on a pump track or flow trail will make learning easier. "Get heavy on the backs of bumps, use that pressure to get a little bit of speed, then get light on the front of the bump to absorb it. The feeling of pumping is so good, it's a stoke-maker. You get that little burst of speed."
Once you know how to do this, you can incorporate it into your riding style on all types of terrain. "When you're actively pumping terrain, you're seeking out obstacles to pump, and your line choices change. You find more fun lines, you're cavorting more, having more fun. Where beginners see obstacles, experts see opportunities."

In your quest to become a better rider, you can also pass on skills to your little ones as well. Rachel Varn, the founder of PedalPower Kids in Annapolis, Maryland, has some suggestions to help little riders develop their abilities.
"We focus a lot on head position and where the eyes are. We teach them that our eyes lead and our bodies follow. Look where you're going, then your body will follow you, and the bike will follow you," Varn says. "This helps to correct the jerky movements and dramatic oversteering that kids tend to do."
Children often have discomfort with the natural tendency of the bike to lean (McCormack and Richter see this with adults as well, when it's time to learn cornering skills).
"One of the big tips we talk about is acknowledging that you are going to lean, as you turn or even in a small way while you're pedaling," Varn says. "A lot of kids struggle because they start to feel the bike lean and they immediately react by bailing out, putting their feet on the ground or worse. We teach them it's okay, and that we fix our wobbles by pedaling more."
The great thing about mountain biking is that it's a lifetime process of acquiring and refining our skillset. "The higher the ability gets, the higher the fun can be," McCormack says. "That equation only works when you're improving your skills."

Frequently Asked Questions
Why can't I get comfortable on my bike?
Discomfort while cycling can be caused by a number of factors, like poor positioning. But it can also be caused by poorly fitted clothes, especially cycling briefs or shorts that are too padded or not padded enough. We recommend exploring our different chamois options to make sure your cycling bottoms offer optimal comfort.
Should I wear gloves while riding?
Gripping the handles of your bike securely and comfortably is essential for correct body positioning. Wearing cycling gloves can boost your bar-gripping confidence, especially on long rides or rough mountain trails.
What cycling shoes should I wear for mountain biking?
Tricky terrain and long rides require shoes with excellent traction. PEARL iZUMi's MTB shoes for men and women offer all-day comfort, specifically designed for conquering mountain trails.


